Candle Dyeing Techniques

Candle dyeing is the process of adding candle-safe colorants to melted wax to create candles in different shades, tones, and decorative effects. The right dyeing technique helps achieve even color, good appearance, and consistent results without affecting candle performance.
1. Choose the Right Candle Dye
Use colorants specifically designed for candles. Common types include:
- Liquid candle dyes – Easy to measure and blend.
- Dye blocks – Concentrated and suitable for larger batches.
- Dye chips – Convenient for consistent coloring.
- Powder dyes – Highly concentrated and useful for strong shades.
- Flakes or granules – Easy to portion for different batch sizes.
Avoid ordinary food colors, water-based colors, or unsuitable pigments because they may not dissolve properly in wax and can interfere with the wick.
2. Melt the Wax Completely
Start by melting the wax according to the recommended temperature for that particular wax.
The wax should be fully melted and free from solid pieces before adding the dye. Unevenly melted wax can result in inconsistent color.
3. Add Dye Gradually
Add a small quantity of dye to the melted wax and stir thoroughly.
It is better to start with a small amount and gradually increase the concentration rather than adding too much dye at once.
For example:
Light shade → Small amount of dye
Medium shade → Increase dye gradually
Dark shade → Add additional dye after checking the color
The exact dye concentration depends on the wax, dye type, and manufacturer’s recommendations.
4. Stir for Even Distribution
After adding the dye, stir the wax thoroughly to distribute the color evenly.
Make sure the dye has completely dispersed or dissolved before pouring. Inadequate mixing can cause:
- Streaks
- Uneven color
- Dark spots
- Color separation
- Different shades within the same candle
5. Test the Color
The color of hot melted wax can look different from the finished candle.
A simple test is to place a small amount of colored wax on a cool surface or make a small test candle. Allow it to cool completely and inspect the final shade.
This is particularly important when creating custom colors.
6. Mixing Different Colors
You can create new shades by combining compatible candle dyes.
| Desired Color | Possible Color Combination |
|---|---|
| Orange | Red + Yellow |
| Green | Yellow + Blue |
| Purple | Red + Blue |
| Pink | Small amount of Red + White wax |
| Brown | Red + Yellow + Blue |
| Light Blue | Blue + White wax |
| Dark Green | Green + Small amount of Blue |
Always test small batches before coloring a large quantity.
7. Layered Candle Dyeing
Layering creates candles with multiple colors.
Basic method:
- Prepare the first colored wax.
- Pour it into the mould or container.
- Allow it to cool sufficiently.
- Prepare the second color.
- Pour the second layer carefully.
- Repeat for additional layers.
Different pouring temperatures and cooling conditions can create different visual effects.
8. Gradient or Ombre Dyeing
An ombre candle gradually changes from a darker shade to a lighter shade.
For example:
Dark Blue → Medium Blue → Light Blue → White
Prepare several batches with progressively lower dye concentrations and pour them in sequence.
9. Marble Effect
A marble effect can be created by combining two or more colors without completely blending them.
For example:
White + Blue → Marble Blue/White
Careful pouring and controlled stirring can produce attractive patterns.
10. Two-Tone and Multicolor Candles
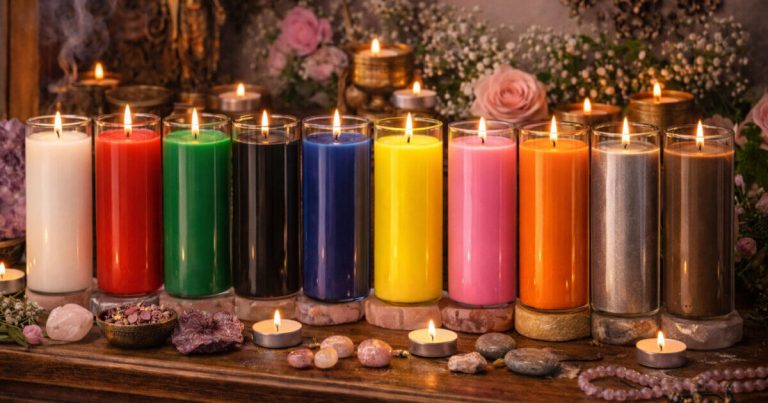
Different sections of a candle can be colored separately to create:
- Two-tone candles
- Striped candles
- Rainbow candles
- Geometric patterns
- Decorative color combinations
These techniques are particularly useful for decorative and handmade candles.
Important Candle Dyeing Tips
- Always use candle-compatible dyes.
- Measure dye consistently for repeatable results.
- Add dye gradually rather than guessing.
- Stir thoroughly for uniform color.
- Test the cooled wax before producing a large batch.
- Remember that the wax base affects the final color.
- Soy and other naturally creamy waxes may produce softer or muted shades.
- Excessive colorant can potentially affect wick performance, so burn testing is important.
- Keep records of wax quantity, dye quantity, temperature, and final color.
Factors That Affect Final Candle Color
Several factors can change the final appearance:
Wax Type: White, natural, or translucent waxes produce different results.
Dye Concentration: More dye generally produces a stronger color, within the dye’s recommended limits.
Fragrance: Some fragrance oils can slightly influence the appearance of the finished wax.
Temperature: Adding and mixing dye at inappropriate temperatures can affect dispersion.
Cooling: Cooling conditions can influence the final appearance and surface finish.
Lighting: A candle can appear different under warm, cool, or natural lighting.
In Short
Candle dyeing techniques allow candle makers to create consistent colors and decorative effects such as solid colors, gradients, layers, marble patterns, stripes, and multicolor designs. The key is to use the correct candle dye, add it gradually, mix thoroughly, test the cooled color, and perform burn tests to ensure that the finished candle performs properly.